Most growers underestimate tray cost because they only count seed and media. However, the real cost of microgreens also includes electricity, water, sanitation, harvest labor, packaging, waste, delivery, and sometimes even cold storage. This microgreens cost calculator helps you see the full picture before you scale up or start selling.
Whether you grow microgreens on a kitchen shelf, in a small indoor rack, or as part of a Vertical Gardening setup, the key question is the same: what does each saleable tray, pack, or gram really cost?
As a result, this calculator is useful for home growers, small commercial growers, urban gardeners, chefs, and anyone testing indoor Vegetable gardening as a serious side project. In practice, microgreens can look simple, but the numbers only make sense when you measure every input.
What is a microgreens cost calculator?
A microgreens cost calculator is a planning tool that totals production inputs such as seed, growing media, electricity, labor, packaging, sanitation, overhead, and delivery. Then, it converts those numbers into cost per tray, cost per gram, cost per pack, and break-even selling price.
Microgreens by the Numbers: Growing and Cost Planning
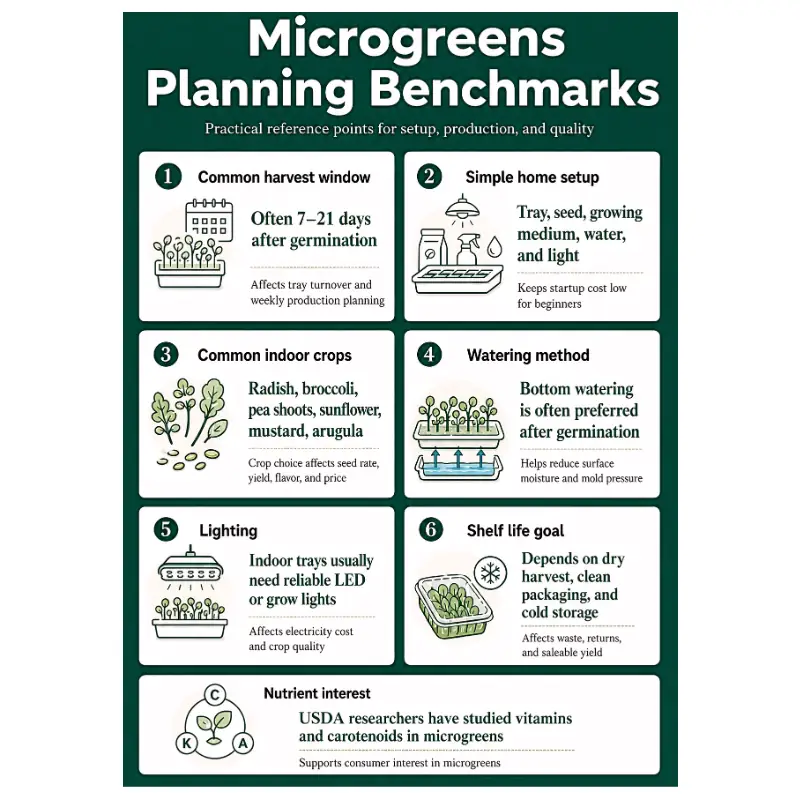
Microgreens are attractive because they grow quickly and use limited space; for example, the University of Maryland Extension microgreens guide explains that many microgreens can be grown indoors in shallow trays with seed, water, growing medium, and light.
However, their profitability depends on crop choice, yield, loss rate, packaging, and selling price. Therefore, the table below gives practical planning points that connect directly to the calculator.
Why Microgreens Cost More Than Seed and Media
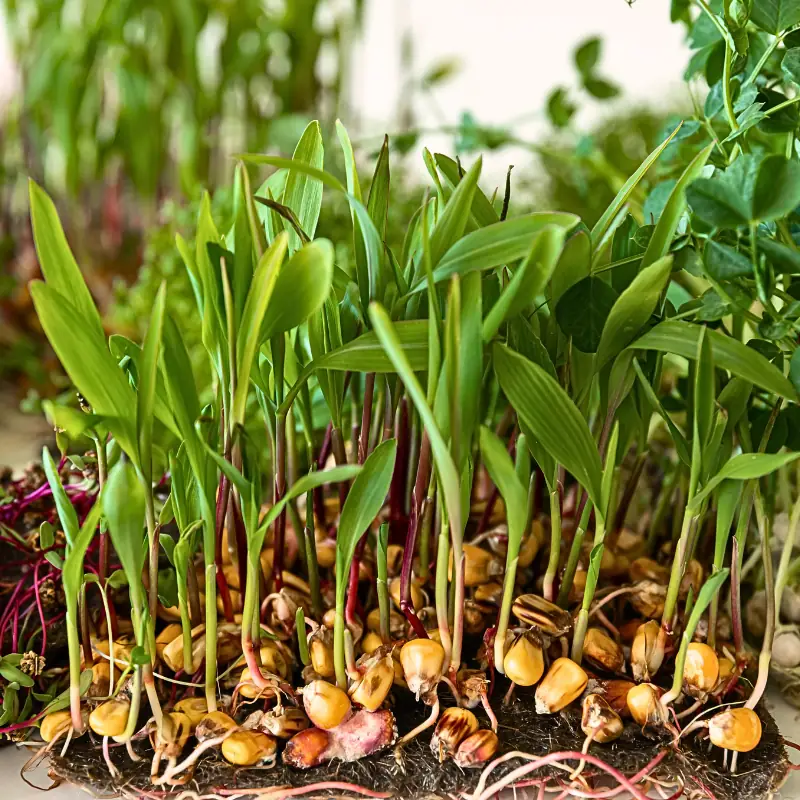
Seed and growing media are only the visible costs. However, a real microgreens tray also carries electricity, water, tray depreciation, sanitation, harvest labor, packaging, cooling, delivery, and waste. If a tray fails from mold or poor germination, the grower has already spent seed, time, media, water, and growing space.
Because of that, microgreens should be treated as a small production system, not just a quick gardening project. Even in a home setup, tracking inputs helps reduce waste and improve decisions around Plant/Soil health, airflow, watering, and seed density.
For small commercial growers, this is even more important. Sustainable farming and Organic farming are not only about avoiding waste in the field. They are also about understanding where resources are used, where losses happen, and where better decisions can improve profit and consistency.
Seed Rate, Yield, and Losses Drive the Real Cost
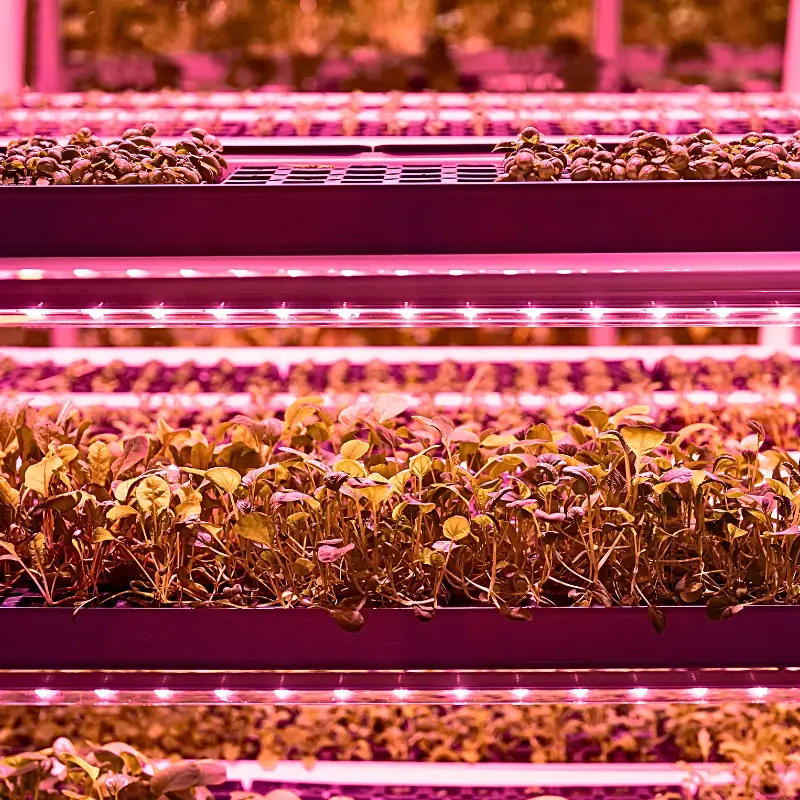
Three numbers matter more than almost anything else: seed rate, yield per tray, and loss percentage. If seed rate is too low, the tray may look thin and produce less saleable weight. If seed rate is too high, airflow drops, humidity increases, and mold risk can rise.
Therefore, seed rate should be adjusted by crop. Sunflower, pea shoots, radish, broccoli, mustard, basil, barley, and arugula do not behave the same way. They also do not cost the same to grow.
Yield should also be measured from your own trays, not copied from perfect examples online. In practice, real yield is affected by seed quality, growing medium, light distance, temperature, humidity, harvest stage, trimming, and postharvest handling.
Finally, losses should be entered honestly. Include poor germination, mold, quality culls, trimming loss, unsold packs, and product that spoils before sale. As a result, the calculator becomes more realistic and more useful.
Lighting, Labor, and Packaging Are Easy to Underestimate
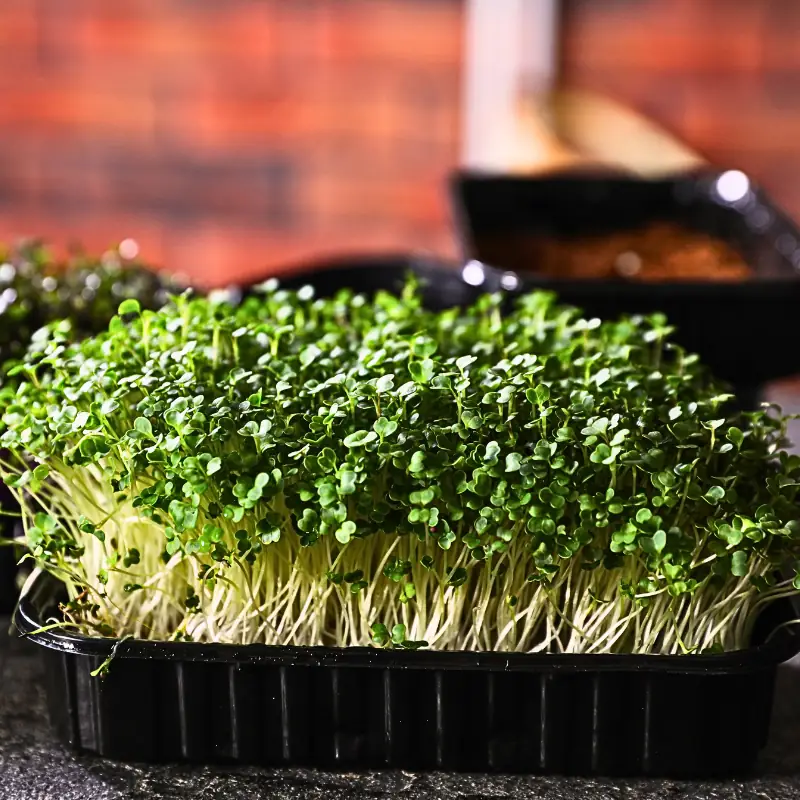
Indoor microgreens need light, and light has a cost. Even efficient LEDs should be calculated because the cost increases when you add shelves, racks, and repeat batches. The UConn Extension guide to growing microgreens also explains how microgreens can be grown indoors using trays, growing media, water, and light, which is exactly why setup costs should not be ignored.
Labor is another hidden cost. Sowing, watering, checking, harvesting, washing or drying, packing, labeling, cleaning trays, and delivery all take time. Therefore, if you want to sell microgreens, your own labor should not be treated as free.
Packaging also matters. Clamshells, bags, sleeves, labels, absorbent pads, and rejected packs all affect the real cost per saleable unit. In Urban Agriculture Technology and IoT Farming Solutions, we often focus on sensors, lights, and climate control. However, packaging and labor can quietly decide whether the crop is profitable.
When to Use Separate Calculations for Each Crop
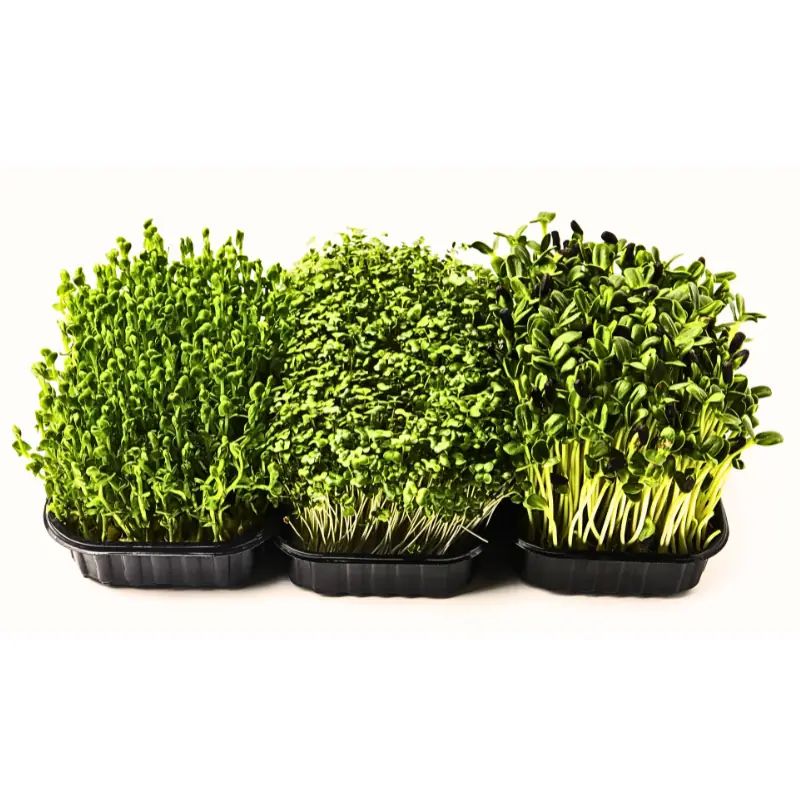
Do not use one average number for all microgreens. Sunflower, pea shoots, radish, broccoli, mustard, basil, barley, and arugula all have different seed costs, seed rates, cycle lengths, yields, shelf life, and market prices.
Crop choice can also affect customer interest. For example, USDA microgreens research has highlighted how nutrient levels can vary between different microgreen varieties, which is another reason growers should compare crops separately rather than treating all trays the same.
For that reason, run the calculator separately for each crop. Then, compare cost per gram, cost per pack, and profit margin. This helps you see which crops are better for home use, farmers markets, restaurants, or small indoor production.
How to Get the Most from This Microgreens Cost Calculator

Work through the 12 steps in order, starting with your unit system, currency, tray count, and crop setup.
Then, enter the real costs you know — seed, growing media, electricity, water, sanitation, equipment, harvest labor, packaging, overhead, delivery, and selling price assumptions. You do not need to complete every field; if a cost does not apply, leave it as zero.
For the most accurate results, avoid round guesses where possible. Small errors in seed rate, yield, labor, packaging, or losses can change the final cost per tray, pack, gram, or ounce. Also, run the calculator separately for each crop because sunflower, pea shoots, radish, broccoli, basil, and barley all have different seed costs, yields, cycle lengths, and shelf life.
Finally, use Step 12 to review your full cost breakdown, pie chart, cost per finished unit, and markup tool. After each batch, compare your estimated costs with actual results. As a result, you can find hidden waste, weak margins, and better pricing opportunities before investing in more seed, trays, or equipment.
Final Takeaway: Grow Small, Measure Everything
Microgreens are a strong fit for indoor Vegetable gardening, Vertical Gardening, Climate-Smart Cultivation, and small-space food production. They grow quickly, use limited space, and can be produced close to where they are eaten.
However, profit comes from measurement. Start small, record your real numbers, and update the GardenAgroTech Microgreens Cost Calculator after every few batches. The difference between your estimate and your actual cost is where most growers find hidden waste — and, therefore, hidden margin.
In a wider sense, this is also where AgTech innovations and Regenerative Agriculture thinking meet practical gardening. The goal is not only to grow more. The goal is to grow smarter, waste less, and understand the system behind every tray.
You can also explore more GardenAgroTech gardening calculators and agriculture calculators to compare costs across different crops, growing systems, and production methods before planning your next crop.
Step 1: Production Scale, Units, Tray Count & Selling Unit
Choose the global unit system first. The calculator uses stable internal conversions, then displays seed, yield, packaging, CO₂, area, and delivery fields in the selected system.
Step 2: Facility Model & Batch Allocation
Allocate only the facility share used by this batch. Do not include racks, trays, lamps or tools here; those belong in equipment depreciation.
Step 3: Seed Cost & Sowing
Step 4 — Growing Media, Mats & Disposable Consumables
Media and disposable tray materials are allocated to all trays started, including trays later discarded, because these materials are normally used at sowing.
Step 5: Lighting, Water, Climate & CO₂
Step 6: Sanitation, Disinfection & Food Safety
Use this for seed soak cost, tray washing, rack cleaning, tool cleaning, and room reset. The calculator tracks cost only; it does not provide chemical concentration recipes.
Step 7: Reusable Equipment & Depreciation
Use this for trays, racks, blackout lids, lamps, fans, scales, scissors, bins, watering tools and CO₂ equipment when not included in Step 5.
Step 8: Crop Loss, Harvest Labor & Pack-Out
Step 9 — Packaging, Labels, Selling Unit & Optional Blend Builder
This step turns tray yield into real selling units. For example, if one tray produces 400 g and one container holds 80 g, the calculator will show 5 containers per tray. The optional Blend Builder is for post-harvest mixes such as salad mix, spicy mix, pea + radish, or chef blends.
Use this only when this crop run will become one ingredient in a mixed microgreens pack. The main calculator still answers: what does one saleable unit from this crop run cost? The Blend Builder answers a separate question: if I combine this crop with other harvested crops, what is the estimated mixed-pack ingredient cost and how many complete mixed packs can I make?
Step 10: Overhead, Insurance & Compliance
Step 11: Sales Channel, Marketing & Delivery
Use this step for selling costs after production: marketing, samples, market/platform fees, cost-base commission estimates, and delivery route costs.
Delivery inclusion note will update after calculation.
Step 12: Final Summary, Charts, Markup & Export
Main results show the cost of this calculator run only — for example, one 80 g sunflower clamshell from this batch. The optional Blend Builder in Step 9 is separate and does not replace this unit cost; it is only for estimating a mixed pack made from this crop plus other harvested crops.
| Component | Total Cost | % of Total | Cost per Unit | Visual |
|---|
Cost Breakdown – Pie Chart
Markup & Selling Price
Baseline Cost per Unit: —
Selling Price per Unit: —
Profit per Unit: —
Profit Margin %: —
Total Profit (Entire Batch): —
Export Summary (CSV)
Save / Load Settings (JSON)
Help
Calculate Your Delivery Distance
Production cost is only part of the story. If you deliver to a processor, wholesaler, fresh market, or supermarket, distance affects fuel, time, labor, and scheduling.
👉 Use Google Maps: https://www.google.com/maps to check the real travel distance to your buyer and treat delivery as part of the margin discussion, not as an afterthought.

How much seed should I use per 1020 tray of microgreens?
There is no single seed rate that works for every crop. Larger seeds such as sunflower, peas, and barley need much higher seed weights than small seeds such as broccoli, radish, mustard, or arugula. The best approach is to start with a crop-specific seed rate, record the result, and adjust slowly from one batch to the next.
Too little seed gives a thin tray and lower yield. Too much seed can reduce airflow, trap moisture, increase mold risk, and waste expensive seed. For accurate costing, enter your real seed rate per tray in the calculator rather than using a general average.
What yield should I expect from a 1020 tray?
Yield depends on crop type, seed rate, growing medium, light, humidity, airflow, harvest stage, and losses. Fast crops like radish can give a very different yield from sunflower, pea shoots, broccoli, basil, or arugula.
For planning, it is better to use your own average harvested weight per tray after a few test batches. Do not base your pricing only on ideal internet yield numbers. A realistic microgreens cost calculator should include expected yield, tray discard, trimming loss, mold loss, and packaging loss.
How much does it really cost to grow one tray of microgreens?
The true cost of one tray is more than seed and growing medium. A proper calculation should include seed, media or mats, trays and equipment depreciation, electricity, water, sanitation, labor, packaging, rent or space allocation, delivery, and unsold or spoiled product.
Many beginners underprice microgreens because they ignore labor and small overheads. Even if you grow at home, your time, packaging, failed trays, and electricity still affect the real cost per pack or per gram.
How should I price microgreens per ounce, pack, or tray?
Start with your real cost per tray, then divide it by your saleable yield or number of packs. After that, add your target margin. Pricing should be based on cost, local market demand, crop difficulty, packaging size, and customer type.
Retail packs usually need higher margins because they involve more packaging, labeling, display, and unsold-product risk. Restaurant or chef sales may use larger packs or bulk pricing, but delivery and consistency become more important. Live trays are priced differently because they shift some harvest and shelf-life responsibility to the buyer.
Are microgreens actually profitable to sell?
Microgreens can be profitable, but they are not automatic “easy money.” Profit depends on repeat customers, low tray failure, good shelf life, disciplined pricing, efficient labor, and reliable weekly sales.
A grower can produce beautiful trays and still lose money if pricing is weak, delivery is inefficient, or too much product remains unsold. Before scaling, calculate cost per tray, cost per pack, expected selling price, weekly tray volume, and realistic waste. Profit usually comes from repeatable systems, not from one successful batch.
What do grow lights add to the electricity bill?
Lighting cost depends on lamp wattage, number of lamps, hours per day, crop cycle length, and your electricity price per kWh. The basic idea is simple: more watts, more hours, and more racks mean higher electricity cost.
For microgreens, lighting is often manageable compared with seed, labor, and packaging, but it should still be calculated. If your electricity tariff is cheaper at night, using timers may reduce costs, provided the room temperature and workflow still make sense.
Should I water during blackout, or switch to bottom watering?
Most growers pre-moisten the medium before sowing, keep enough moisture during germination, and then move toward bottom watering once roots are established. Constant surface misting during blackout can increase humidity around the seed layer and may raise mold risk, especially when trays are too dense or airflow is poor.
The goal is even moisture, not wetness. If trays dry out, germination suffers. If they stay too wet, mold and damping-off become more likely. Watch the crop, weight of the tray, and medium moisture rather than following a blind rule.
Is it mold, or is it just root hairs?
Root hairs are normal and often appear as fine white fuzz close to the roots, especially on young seedlings. They usually look even and may disappear or collapse when misted. Mold tends to spread irregularly across the tray, may appear on seed hulls or media, and can come with a musty or unpleasant smell.
When in doubt, be cautious. If the tray smells bad, has spreading fuzzy growth away from the roots, or shows slimy areas, treat it as a food-safety risk. It is better to discard a questionable tray than risk selling or eating contaminated greens.
How do I stop mold, damping-off, and repeated tray failures?
Most mold problems are linked to one or more of these issues: too much seed, poor airflow, high humidity, overwatering, dirty trays, poor seed quality, or warm stagnant conditions. Prevention is much better than trying to rescue a bad tray.
Use clean trays, reliable untreated seed, proper seed density, good drainage, bottom watering where possible, gentle airflow, and a clean growing area. Sanitation should be part of your normal cost calculation because recurring mold quickly destroys profit through lost trays, wasted seed, and extra labor.
Should I wash microgreens before packaging or selling?
Many growers prefer to sell clean, unwashed microgreens with “wash before use” instructions because washing can add surface moisture and shorten shelf life if drying is not excellent. However, expectations and rules may vary by market, buyer, and local food-safety requirements.
If you wash microgreens, you need clean water, clean equipment, careful drying, cold storage, and hygienic handling. Washing adds labor, time, and spoilage risk, so it should be included in the calculator if it is part of your process.
How do I package and store microgreens so they last longer?
Shelf life depends on harvesting at the right stage, avoiding excess moisture, cooling the product quickly, using clean packaging, and keeping the cold chain stable. Wet microgreens packed into sealed containers often break down faster because condensation encourages spoilage.
A good practice is to avoid watering immediately before harvest, remove excess surface moisture, pack gently, keep containers cool, and avoid crushing the greens. Packaging choice matters because it affects presentation, shelf life, labor, and cost per saleable unit.
Should I sell live trays or cut microgreens?
Both models can work. Cut microgreens are convenient for customers and easier to portion into retail packs, but they require harvest labor, packaging, cooling, and shelf-life control. Live trays can stay fresh longer and reduce harvest labor, but they are bulkier to transport and may not suit every chef, market, or food-safety expectation.
For commercial planning, compare both options carefully. Live trays may reduce packaging cost but increase delivery complexity. Cut packs may sell better at retail but require more labor and better postharvest handling. The best choice depends on your buyers, crop type, space, and sales model.